New Countertops Can Transform Your Kitchen — But What Does the Process Actually Look Like?
Upgrading your countertops is one of the most impactful changes you can make to a kitchen or bathroom. New countertops instantly modernize the space, improve functionality, and add real value to your home. But if you've never been through the process before, it's natural to wonder what's involved.
At Monarch House Construction, we walk Hialeah homeowners through every step so there are no surprises. Whether you're choosing quartz, granite, marble, or another surface material, here's a clear look at what to expect from start to finish during a countertop installation.
Step 1: Choosing Your Countertop Material
Before any work begins, you'll need to select the material that fits your lifestyle, budget, and design vision. Here are some of the most popular options we install for homeowners in Hialeah and surrounding areas:
- Quartz: Engineered stone that's durable, low-maintenance, and available in a wide range of colors and patterns. It resists staining and doesn't require sealing.
- Granite: A natural stone known for its unique veining and heat resistance. Each slab is one of a kind, which appeals to homeowners who want a distinctive look.
- Marble: Elegant and timeless, marble is a classic choice for bathrooms and kitchen islands. It does require more maintenance and periodic sealing.
- Solid surface: A budget-friendly option that offers a seamless appearance and is easy to repair if scratched or damaged.
During your consultation, we'll help you weigh the pros and cons of each material based on how you use your kitchen or bathroom daily. We'll also discuss edge profiles, color coordination with your cabinets, and any backsplash considerations.
Step 2: Templating — Measuring for a Perfect Fit
Once you've selected your material and your cabinets are fully installed, we schedule a templating appointment. This is one of the most important steps in the entire process.
A technician will come to your home and create a precise template of your countertop layout. This involves measuring every angle, cutout, and edge — including spaces for your sink, cooktop, and any other fixtures. Modern templating often uses digital laser measuring tools, which ensures accuracy down to fractions of an inch.
Why does this matter? Stone and engineered surfaces are fabricated based on these exact measurements. Even small errors can lead to gaps, poor seam placement, or ill-fitting sink cutouts. Accurate templating is what separates a professional-grade installation from a sloppy one.
What You Should Do Before Templating Day
- Make sure all base cabinets are installed and level.
- Have your sink and cooktop purchased or at least have the exact model numbers ready so cutout dimensions are correct.
- Clear the existing countertop area so the technician has full access.
- Decide on your faucet placement if it's going through the countertop rather than the wall.
Step 3: Fabrication
After templating, your countertop material goes to a fabrication shop where it's cut, shaped, and polished according to the template. This step typically takes one to two weeks depending on the material, complexity of the layout, and current demand.
During fabrication, the edges are profiled to your chosen style — whether that's a simple eased edge, a beveled look, or a more decorative ogee profile. Sink and cooktop cutouts are also made during this phase.
This is the part of the process where patience pays off. Rushing fabrication can lead to mistakes, so we always recommend giving the fabrication team the time they need to get it right.
Step 4: Old Countertop Removal
On installation day, the first task is removing your existing countertops. If you have laminate countertops, this is usually straightforward. Removing old stone countertops takes a bit more care due to their weight.
Our crew handles removal carefully to avoid damaging your cabinets, walls, or plumbing connections. We also disconnect your sink and any appliances that are attached to the countertop surface. In most cases, we can haul away the old material for you as part of the project.
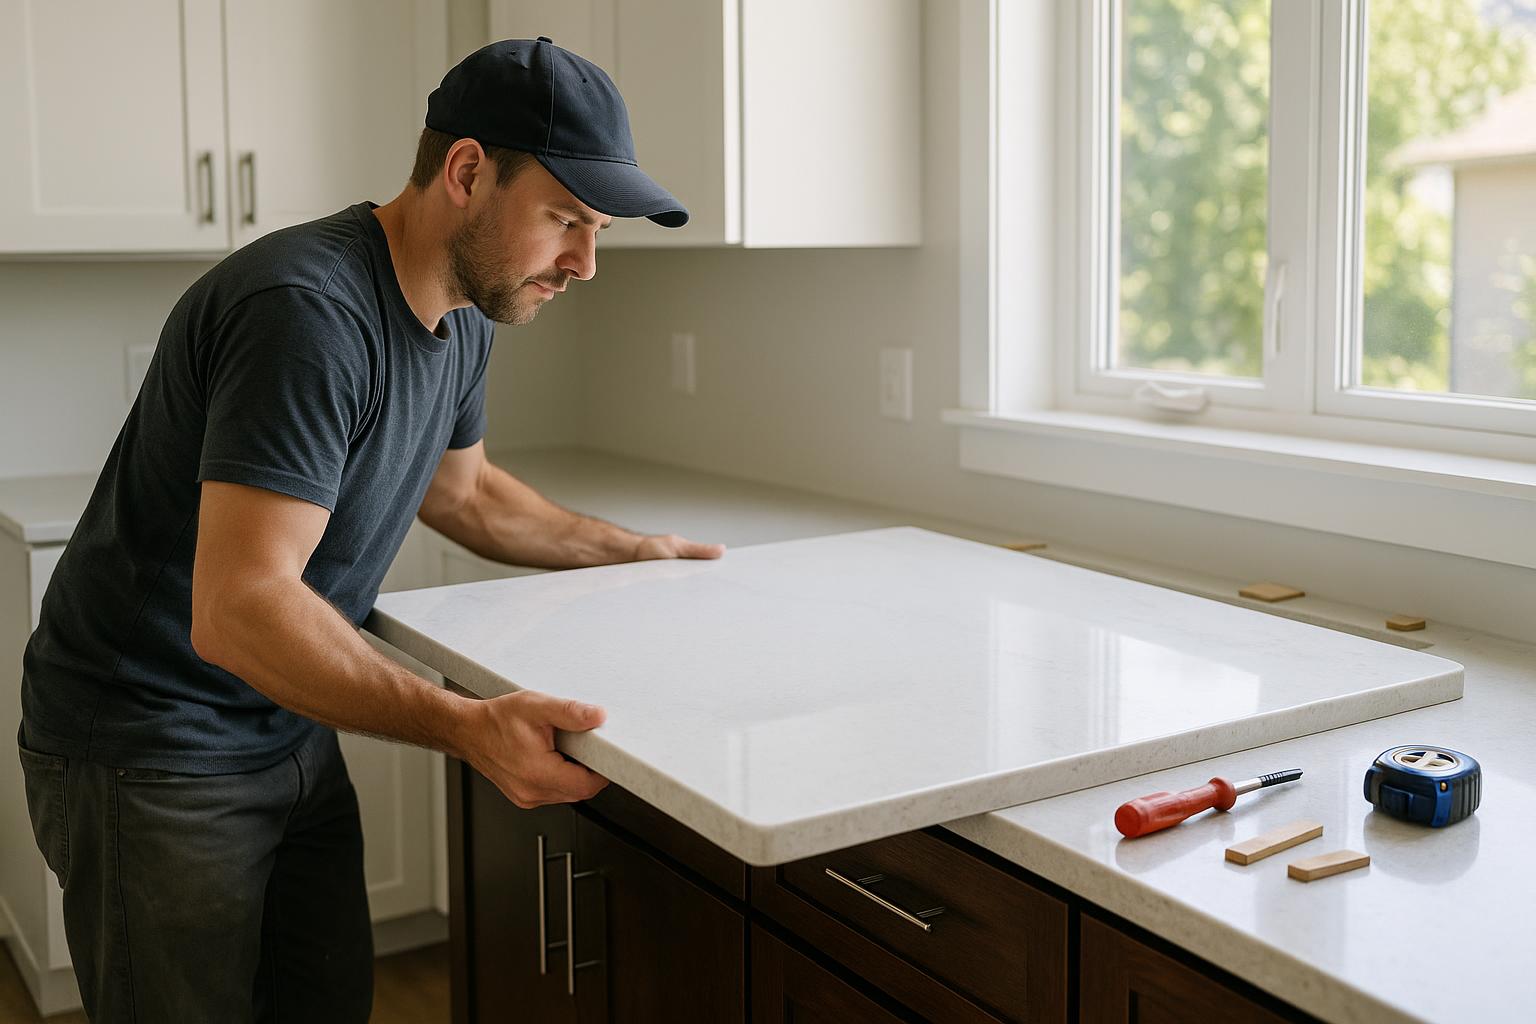
Step 5: Installation Day
This is the exciting part. Here's what typically happens:
- Dry fitting: The new countertop pieces are carefully brought in and placed on top of the cabinets to check the fit. Adjustments are made as needed.
- Leveling and shimming: The countertop must sit perfectly level. Shims are placed beneath the surface where necessary to eliminate any rocking or unevenness.
- Seaming: If your layout requires multiple pieces, the seams are joined using color-matched adhesive. A skilled installer makes seams nearly invisible.
- Securing: The countertop is adhered to the cabinets and any support brackets are installed, especially around sink cutouts and overhangs.
- Sink and fixture hookup: Your sink is mounted, and plumbing connections are restored. If you're upgrading your faucet at the same time, this is when it goes in.
- Sealing (if applicable): Natural stone surfaces like granite and marble receive an initial sealant application to protect against stains and moisture.
For most kitchens, the actual installation takes one day. Bathroom countertops with a single vanity are often completed in just a few hours.
Step 6: Final Walkthrough and Care Instructions
Once everything is installed and connected, we do a final walkthrough with you. We check every seam, every edge, and every fixture to make sure you're completely satisfied. This is also when we share care and maintenance tips specific to your countertop material.
For example, quartz owners should avoid placing extremely hot pans directly on the surface, while granite owners should plan on resealing their countertops once or twice a year. These small habits keep your investment looking new for decades.
How Long Does the Entire Process Take?
From your initial consultation to the final walkthrough, most countertop installations take about three to four weeks total. Here's a rough breakdown:
- Material selection and consultation: 1–3 days
- Templating: 1 day
- Fabrication: 7–14 days
- Removal and installation: 1 day
If your countertop installation is part of a larger kitchen or bathroom remodel, we coordinate the timeline so that cabinets, plumbing, and countertops all come together seamlessly.
Why Hialeah Homeowners Trust Monarch House Construction
Countertop installation might seem straightforward, but the details matter. Poor measurements, rushed fabrication, or careless installation can leave you with visible seams, uneven surfaces, or plumbing problems. At Monarch House Construction, we manage every phase of the process so homeowners in Hialeah, Miami Lakes, Doral, and the surrounding communities get results they're proud of.
If you're thinking about upgrading your countertops — whether as a standalone project or part of a full kitchen or bathroom remodel — we'd love to talk through your options. Reach out to schedule a free consultation and let's get started on a surface you'll enjoy using every single day.